Before proceeding with this page, it has been completely superceded by the information found at g4nab.co.uk/svxlink.
Do not proceed further
Owing to a severe hard disk failure the original article has been lost, however having been working with SVXLink for some time, I have been able to reproduce the article, perhaps not in its original form but accurate as can be.
Most of the instructions can in fact be found on my github, to which I shall direct you momentarily.
The requirements for such a node are simple, firstly a Raspberry Pi or similar, but preferably the Pi, as if you use an orange pi, the GPIO instructions may be different. A pi with a network port is preferable, but wifi will work except it does get a little messy. Secondly a CM108 Sound Card – such as the Dollartek brand, with the exposed chip on the top surface. Finally a suitable transceiver that preferably has an output for Squelch or COS, and input for PTT, and Sound in and out. If you are looking to make a repeater, then a pair of transceivers with these aspects.
For the Raspberry Pi, a micro SD card of a minimum of 8Gb is required, but no larger than 32 Gb, as it will be wasted.
For the Sound card, a steady hand and a small tipped soldering iron, some hot glue, a 10K 1/4 watt resistor, and a 2N2222 PNP Transistor. Follow these instructions here for how to modify the sound card. It is very fiddly, and very tiny, and I’d advise getting a couple of sound cards, as they are quite inexpensive.
For the SD Card you will need to place it in a SD Card writer. I recommend using the Raspberry Pi card writer software from RaspberryPi.org as it will give you all the parameters necessary. Not only does it preprogram the SSH access, but adds your current WiFi parameters as well.
For the unitiated you can use svxlinkbuilder for Bookworm that can be found at github.com/f5vmr/svxlinkbuilder that will guide you at every step of the way. Just follow explicitly ALL of the instructions to guarantee a working node or repeater. You can now ignore the rest of this page, as it has largely been superceded by svxlinkbuilder.
We first need to write the operating system to the SD card for used in the raspberry pi. Do not use sudo apt install svxlink-server, as the repository does not contain the full svxlink package lacking the Reflectorlogic.
When running the software, in preference choose the Raspberry OS Bookworm 32 bit Lite, with the user name of pi and password raspberry, before selecting ‘write’ on the button. Ensure also that you have enabled SSH. If you have selected WiFi, then ensure you have entered your Wifi ESSID correctly and the WPA password. When the OS is complete, remove it from the PC (or Mac) and place it in the Raspberry, together with the modified sound card, and before powering up, ensure that you have a means to view the terminal screen. This can be using an HDMI Screen and USB Keyboard or a means to SSH into the terminal from another device in your local network.
Once you have the terminal screen open and you have logged in, you need another software package before proceeding. You will not need to update or upgrade the OS at this stage.
Type at the prompt sudo apt install git -y and enter. This will install the git package necessary to download and begin compiling your node software. When you have been returned to the prompt, type sudo git clone https://github.com/f5vmr/svxlink_raspberry and enter.
This command loads a script that will perform everything from here on in, once we have enabled it. To do this type the following.
sudo chmod +x svxlink_raspberry/*.sh and enter.
If you have selected Bookworm you will have to make a small change in the script, sudo nano svxlink_raspberry/install.sh and look for php8.0 in a line of packages to be installed. Change this to php8.2, and save the file.
Then type sudo bash svxlink_raspberry/install.sh and enter.
The script will now do several things in sequence. Watch for the prompts concerning the sound card, and ultimately the request for your callsign to which to assign to the node. The prompt concerns the used of a modified sound card. If you have not done this select ‘no’.
Now the installation will proceed, first by installing all the updates to the Operating System, followed by the required packages for Svxlink and other software. This will take ages, so go and have a coffee or lunch maybe. I have recently installed a completed node package on a raspberry pi 3A and 3B in 45 minutes, from card-write to full operational status. On a pi B+ or pi 0W this time will be extended considerably.
The strong possibility is that it will shutdown and reboot while you are away so when you return, log in again. It will not be working at this stage, as there are parameters that need modification to make your particular node work. If you are running a simplex node or hotspot it is easier. If it is to be a repeater then get in touch, as you will need help.
Fortunately you can watch a video at this point to play catch up here.
Ok, so you watched the video, with some problems on the audio in places. But it is factually correct, in that it was created as I built the node some time ago.
So back to the build.
Log in to the terminal again and stop the node as follows by typing sudo systemctl stop svxlink and enter. The first thing to understand is the directory structure.
The configuration file for svxlink is here by typing sudo nano /etc/svxlink/svxlink.conf and enter. Scroll through the configuration and you will see several paragraphs. The first problems are usually the configuration of EchoLink, and the location settings in the last paragraph. Read the manual file here at http://www.svxlink.org/doc/man/man5/svxlink.conf.5.html. To configure the EchoLink correctly you will need to sudo nano /etc/svxlink/svxlink.d/ModuleEchoLink.conf and enter your registered details there. You can leave out EchoLink for the moment by placing ‘#’ before the lines in svxlink.conf, and removing the reference to ModuleEchoLink in the [SimplexLogic] or [RepeaterLogic] paragraphs.
If you have any questions after that, then we can perhaps deal with them. Get in touch.
The configuration of the Modified SoundCard for transmission should have been resolved by the script. However there may be some issues with the allocation of the Sound Card within the device. These may have to be resolved on an individual basis, so drop me a line. I am QTHR on QRZ.com.
There are two outstanding issues for you as a user. Firstly at the moment, you cannot see to what you are connecting or how.
I have resurrected the svxportal-uk, and I will add more to this article, however, to connect to the svxreflector, you will need to contact me to update a password to access it. In the svxlink.conf you will find a section [ReflectorLogic], and the line AUTH_KEY=”GET YOUR OWN KEY”. Between the quotes, create your own requested password, and save the file, and send the password to me with your node callsign. When I have updated the reflector on the server, I will acknowledge your request. If I see that there is a problem, I will then be in a position to assist its resolution.
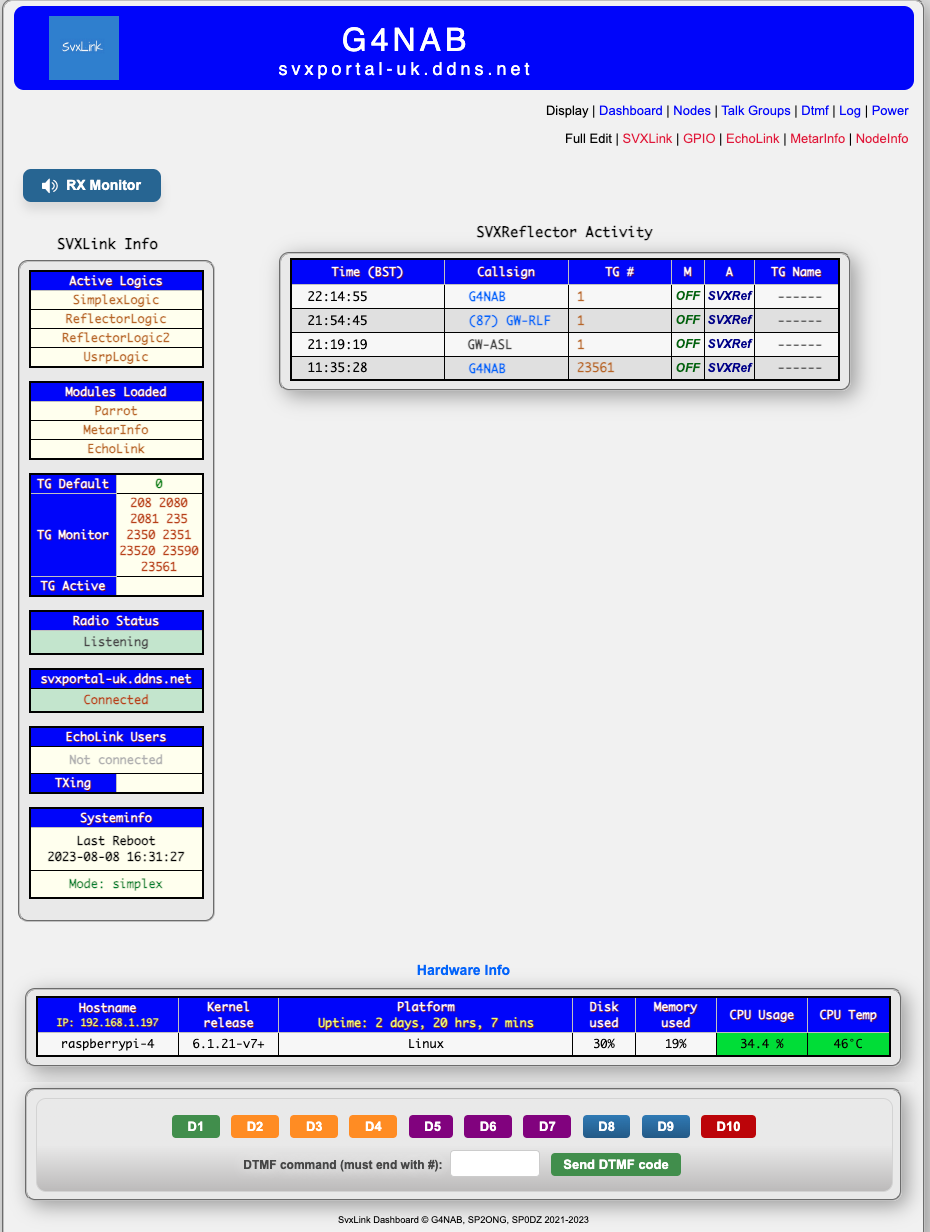
The other issue is the addition of your own dashboard so you can see with a browser that your node is operating. The next article will focus entirely on the Dashboard and its installation.