After several months of work, the Dashboard is now complete and available for all users of the SVXLink from SM0SVX. The dashboard is installed to work with SVXLink on Debain 12 (Bookworm) with PHP8.2 if that is the chosen OS. It may not work on earlier OS and probably not at all on Version 19 or earlier.
When installed it will be necessary for the sysop (system operator) to make a small modification to one file, in order to allow the sysop the security of modifying his own configuration files, whilst having the freedom of exposing the dashboard to public view.
Svxlink is another matter, as I have changed the way that the dashboard sends the DTMF Values to Svxlink. In either SimplexLogic or RepeaterLogic which ever one you use. DTMF_CTRL_PTY=/var/run/svxlink/dtmf_svx replaces the line near the bottom of each of that segment.
It also requires the user to set up the folder /var/run/svxlink and change the ownership of it to svxlink:svxlink to permit the dashboard to send the dtmf to the created symlink. Because this folder is recreated every reboot, create a bash script to set it and the ownership, called by @reboot /var/run/svxlink/bashscriptname in sudo crontab -e, so it will always be there.
With the image from https://portal.svxlink.uk:8443/downloads or svxlinkbuilder or the image, the dashboard with these modification is already included.
Full instructions are available at https://github.com/f5vmr/SVXLink-Dash-V2.
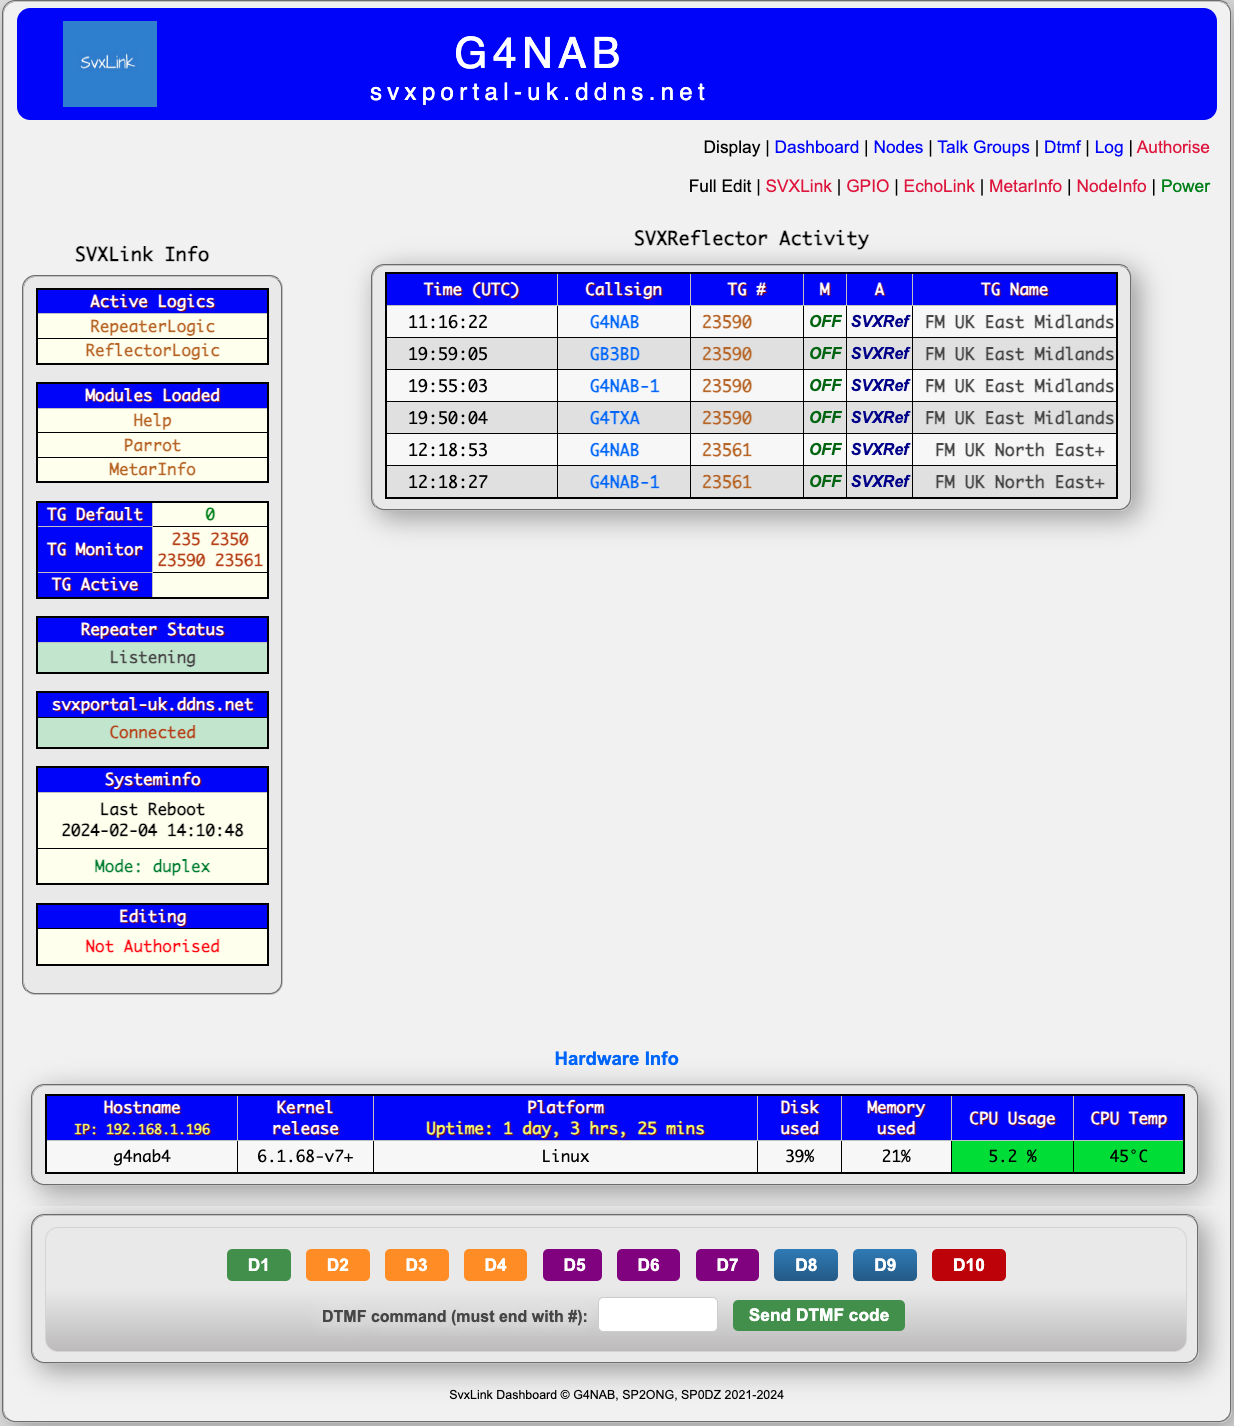
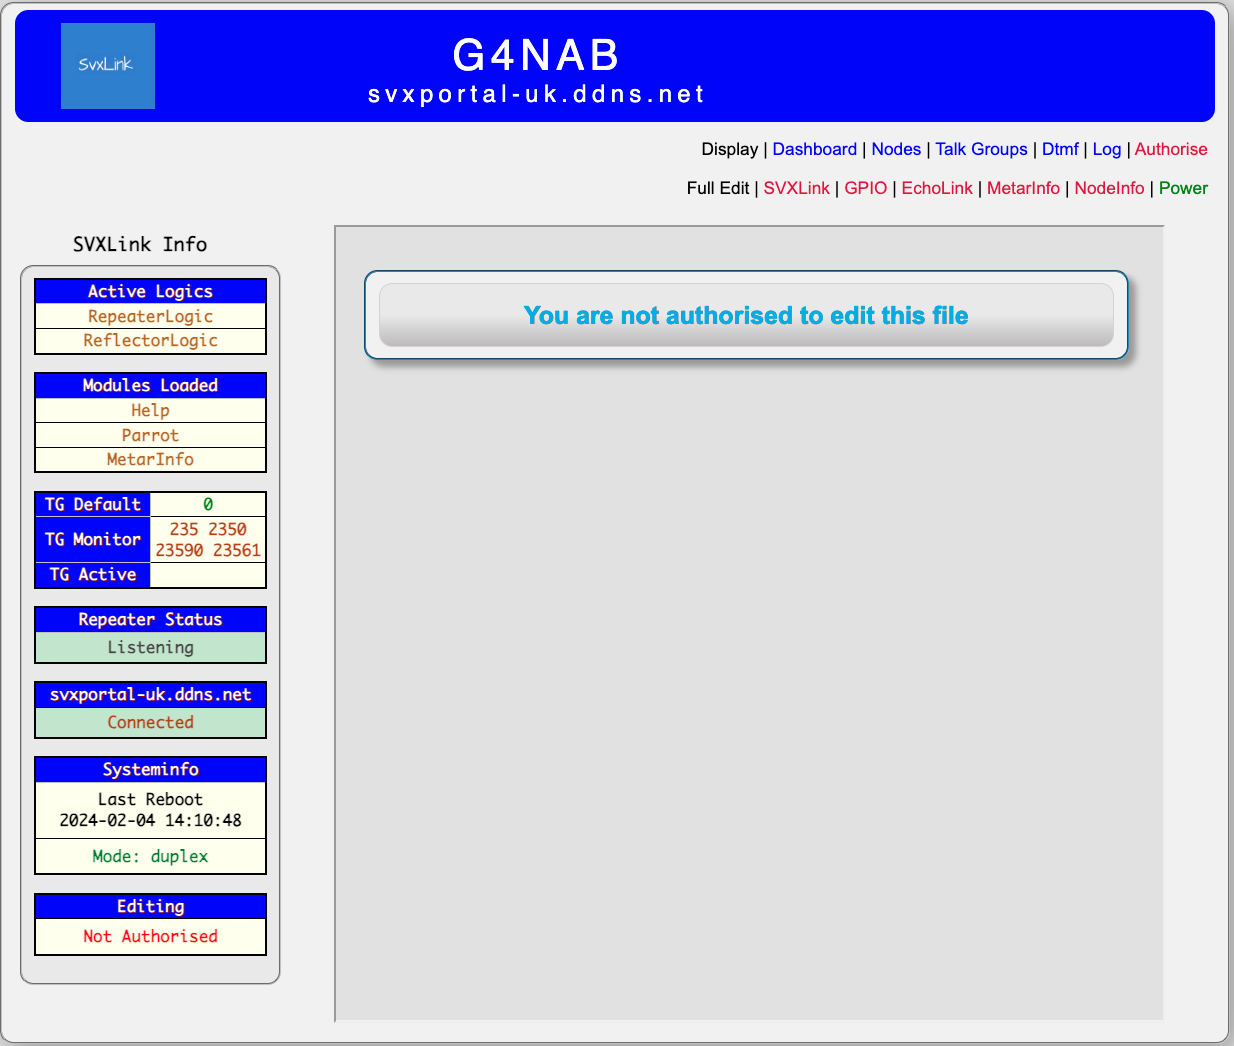
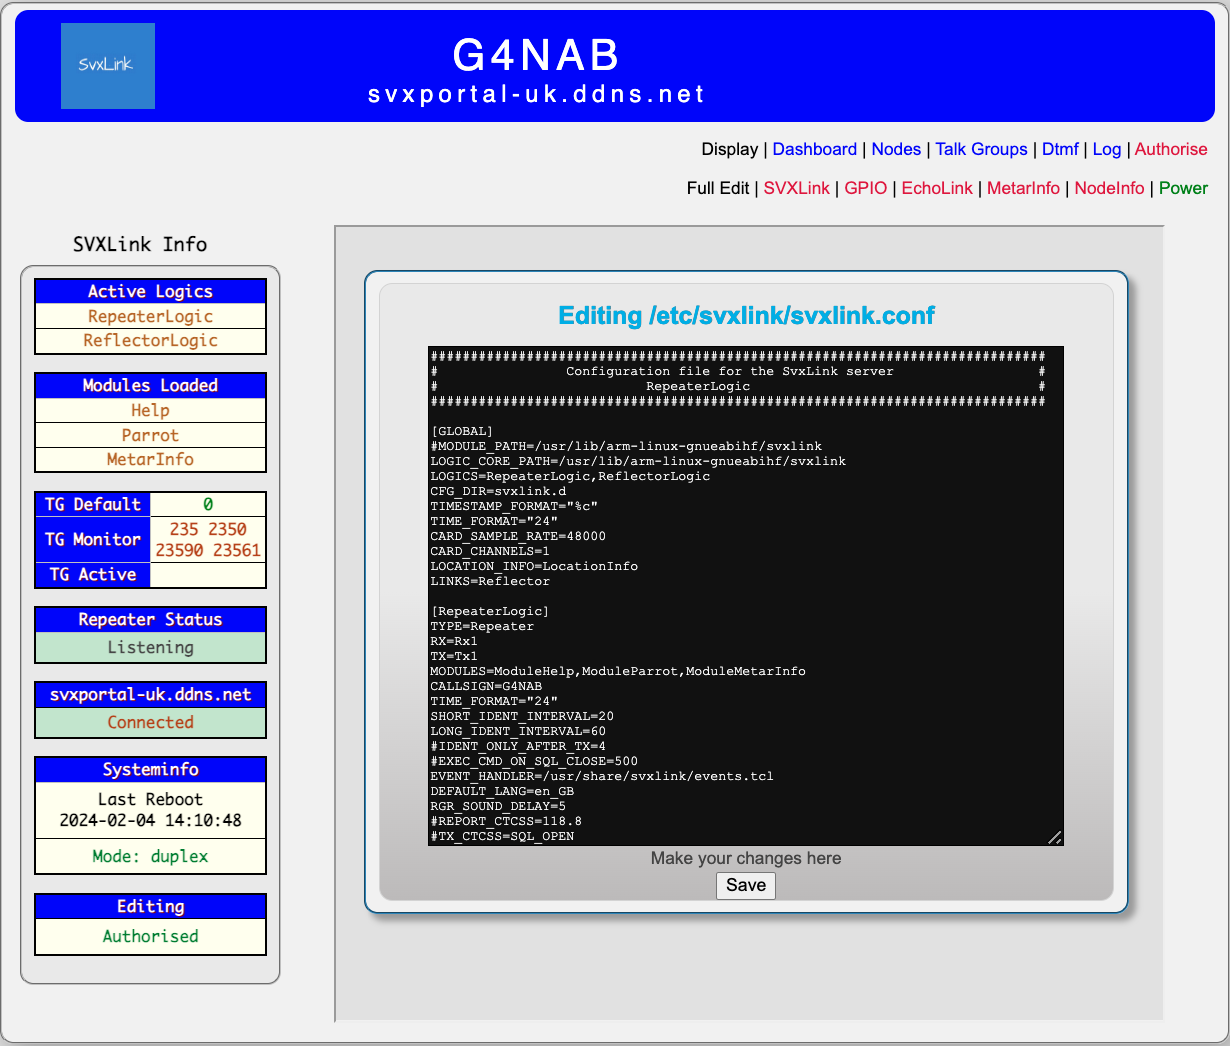
At the bottom of the left hand SVXLink Info parameters, there is now an indication of Editing Authorisation.
Without the authorisation, only the Dashboard Display items are viewable. Access to the Log, Power and all the Full Edit menus are blocked. With the authorisation confirmed, full access to the edit functions, log visibility, power and reset functions become available. Clicking on Authorise provides access for the sysop only to make edits or restart the node, or to reboot it or to shut it down. Clicking on Display Dashboard rescinds the authorisation.
I have now completed some modifications that are required to get the DTMF section at the bottom to work correctly. If yours currently doesn’t then perform the following in ssh of the device in the terminal.
cd /var/www/html
sudo git pull
If you get a further request to make other changes then complete those too, preceded with sudo. One of these refers to git config and the other to git stash. Once you have done these, then run the sudo git pull again.
Then while still in the html directory type sudo ./upgrade.sh and follow the instructions there. At this time your svxlink should now be ready for DTMF activation from the dashboard. If this still hasn’t worked, then first check that in the svxlink.conf either in SimplexLogic or RepeaterLogic if you are using that, to see that this line exists.
DTMF_CTRL_PTY = /var/run/svxlink/dtmf_svx
and make changes as required and save the file and restart svxlink.
If it still fails to perform, verify in the terminal as follows. ls -l /var/run/svxlink
something like this should result –
lrwxrwxrwx 1 svxlink svxlink 10 Aug 27 18:32 dtmf_svx -> /dev/pts/2
If it doesn’t then in which case re run the upgrade.sh file as above.
Thanks to Waldek SP2ONG, Daniel SP0DZ for their original compilation.
Credits: For Tobias Blömberg SM0SVX for the continuing work on SVXLink which is the foundation of this project. To the FM-Poland team and others for inspiration on the Dashboard. To Andreas ‘Adi’ Bier DL1HRC for his other modifications to the project, such as UsrpLogic, and TetraLogic.